https://vimeo.com/169616913
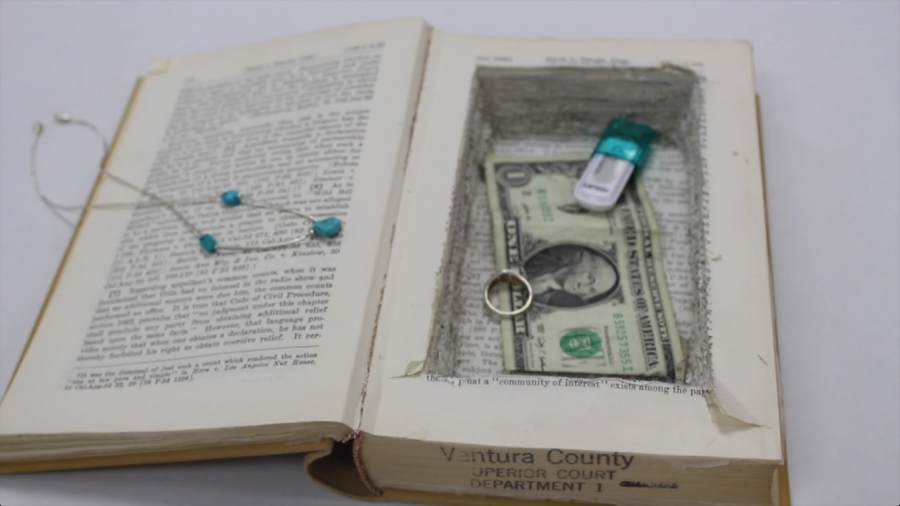
Whether it be hidden in your garage, basement or attic, many of us have that one miscellaneous book lying around with no purpose. It’s time to drag that book out of the dust and either donate it to a used bookstore or use it for this nifty DIY.
However, if you don’t have a hardcover novel at your disposal, I recommend going to one of the local used bookstores in downtown Ventura. Calico Cat Bookshop, for instance, on the corner of Main St. and California St., offers books from various time periods, as well as enhances the atmosphere of downtown.
Also give Copperfields Gifts and Rarities a chance while in the area. Copperfield’s not only offers antique books, but also offers interesting and bizarre nic naks. On one trip you could find a vintage trumpet, and on another a leather journal from Europe.
However, I advise that if you buy a book for this craft specifically, check with the store clerk that you are not purchasing a rare collector book with historical significance. The nature of this project will involve the cutting of the pages, and we do not want to take a historical, ancient and significant book off this earth.
What you will need:
- Hardcover Book
- Box Cutter or exacto knife
- Mod Podge
- Paint Brush
- Parchment paper
How to:
[dropcap size=dropcap]1.[/dropcap]Place a piece of parchment or wax paper between the cover and first pages of the book. This will keep the modpodge from causing the cover to stick to the pages.
[dropcap size=dropcap]2.[/dropcap]The following step will depend on the size of your book. Take a small section of the book and place parchment paper on either side of the section. Mod podge those pages together. For example, if the book is two inches thick, take about ½ inch of paper.
[dropcap size=dropcap]3.[/dropcap]Repeat step two for the end section of the book.
[dropcap size=dropcap]4.[/dropcap]Glue the outer edges of the book with a few strokes.
[dropcap size=dropcap]5.[/dropcap]Wait for all glue to dry clear and use heavy objects to weigh the book down.
[dropcap size=dropcap]6.[/dropcap]Once all glue is dried it is time to form the compartment to store your treasures. Using a straightedge decide upon a shape for the storage compartment. Obviously, it will be easiest to do a quadrilateral.
[dropcap size=dropcap]7.[/dropcap]The most tedious part of this task will be to cut page by page of your shape. Take your time, and avoid paper cuts. It took about two hours for me to cut through 600 pages.
[dropcap size=dropcap]8.[/dropcap]Once all the pages are cut to your liking, if desired seal the pages with glue and let dry. Depending on the book you may or may not need to glue the book again. Mine was well sealed from the outer pages making it less necessary to apply glue on the inside.
[dropcap size=dropcap]9.[/dropcap]Put fun objects or coins into the book!
If you don’t see the need to make this specific DIY, there are other variations of it that may be deemed more useful, such as a place to hide a Wi-fi router. Instead of making a compartment inside the book, discard of all the pages, and you should be left with just a hardcover. Simply slide the router into the cover and let it sit on a shelf; a perfect way to hide all of the unappealing cords.


Jack Herer • Jul 4, 2016 at 1:22 am
LOL, that book is from the Court House
Concerned Book Lover • Jun 11, 2016 at 9:39 am
Hope you didn’t steal this book from the “Ventura County Superior Court”, Suvee. Great video! Love the voice-over and the great angles on the camera.