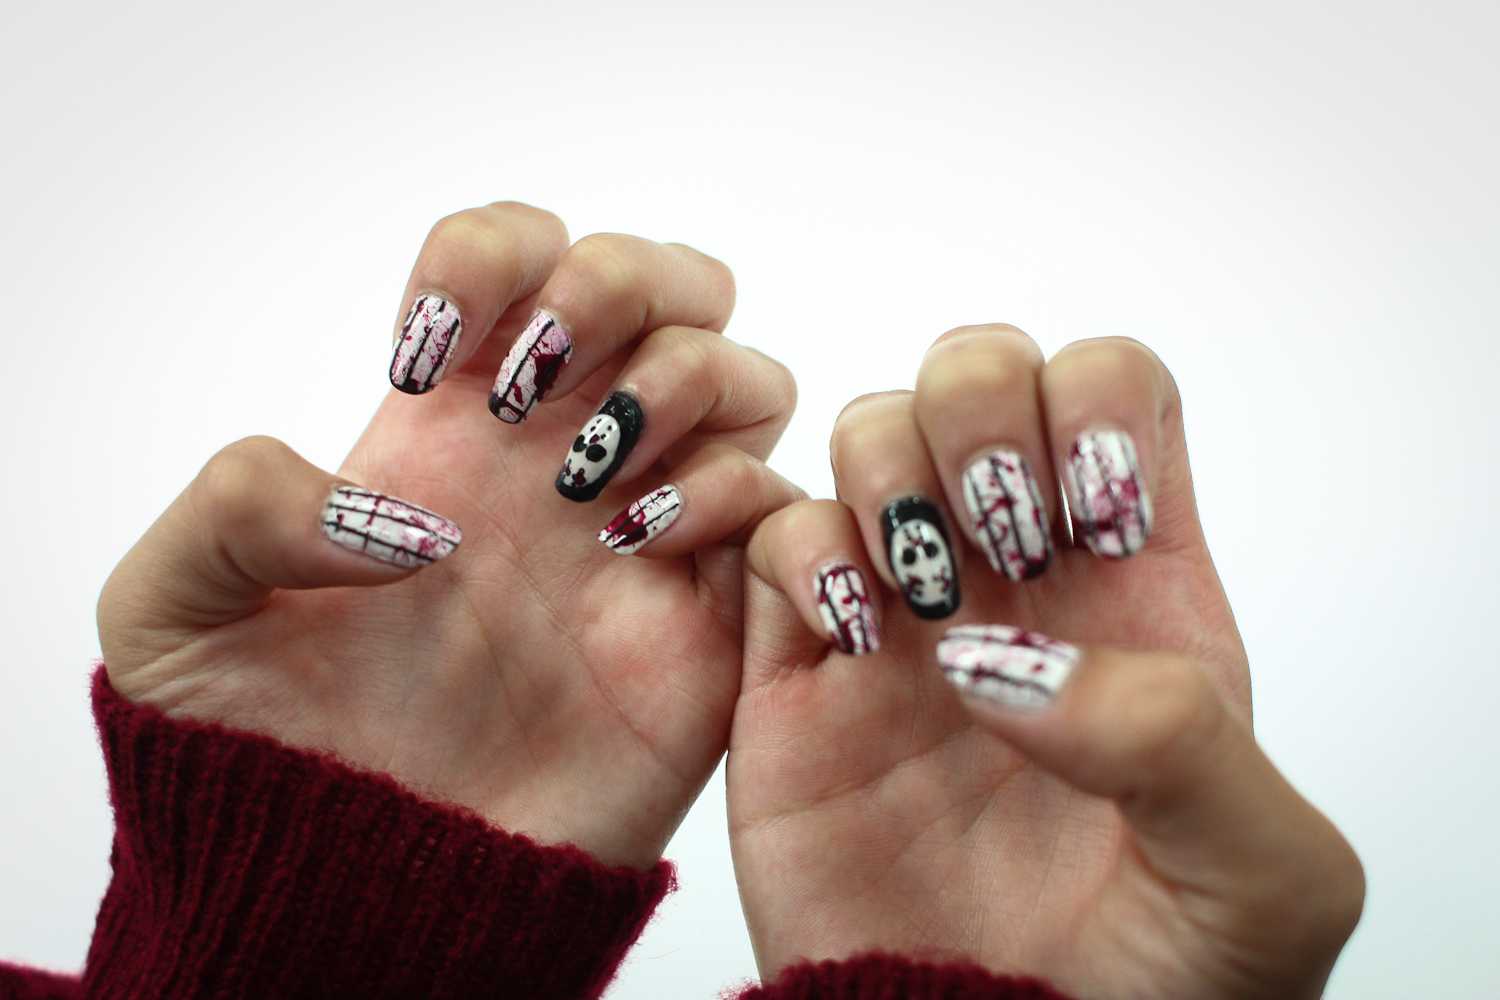
What better accessory could you add to this year’s Halloween costume than wicked cool nails? With a dab of nail polish and a cool design, it’s an easy way to enhance your costume and cause your friends to turn green with envy. If you are wanting to channel your inner slasher, a killer Friday the 13th nail design will do the trick.
How to create Friday the 13th Nail Art:
1. Prep your nails with a clear base coat. Applying a base coat keeps the polish smooth and long lasting.
2. Swipe a white polish over four nails and paint your ring fingers black. Apply 2-3 times, or until the white/black polish solidly covers the nail. Tip: wait until the polish has completely dried before moving onto Step 3.
3. After your nails have completely dried, paint red polish on an empty plastic snack bag and dab it all over your nails so that each one looks as though blood has been splattered all over it.
4. Let the “splattered blood” dry before painting three black slash marks, vertically over four of your nails.
5. On the fifth nail (ring finger) paint the Jason Mask. Do this by creating an egg-like shape in white. Let the white shape dry before creating two black eye holes and adding small black holes on the top and bottom of the mask.
6. Add the three red triangles to the mask and finish it off with a clear top coat that you should apply to all of your nails so the paint will last longer without chipping.
Be prepared for all of the attention your awesome nails will be receiving all night long. Who knows, maybe you’ll get extra candy for having the scariest nails on the block.


S Square Beauty Salon • May 3, 2021 at 12:41 pm
I can only express a word of thanks! Nothing else. Because your topic is nice, you can add knowledge. Thank you very much for sharing this information.
Best nail art services in vizag